 CodeZero
Quick - Creating your first flow
We will build a simple flow that listens for a GET request and immediately answers back with a classic pong.
Kickstart a new flow
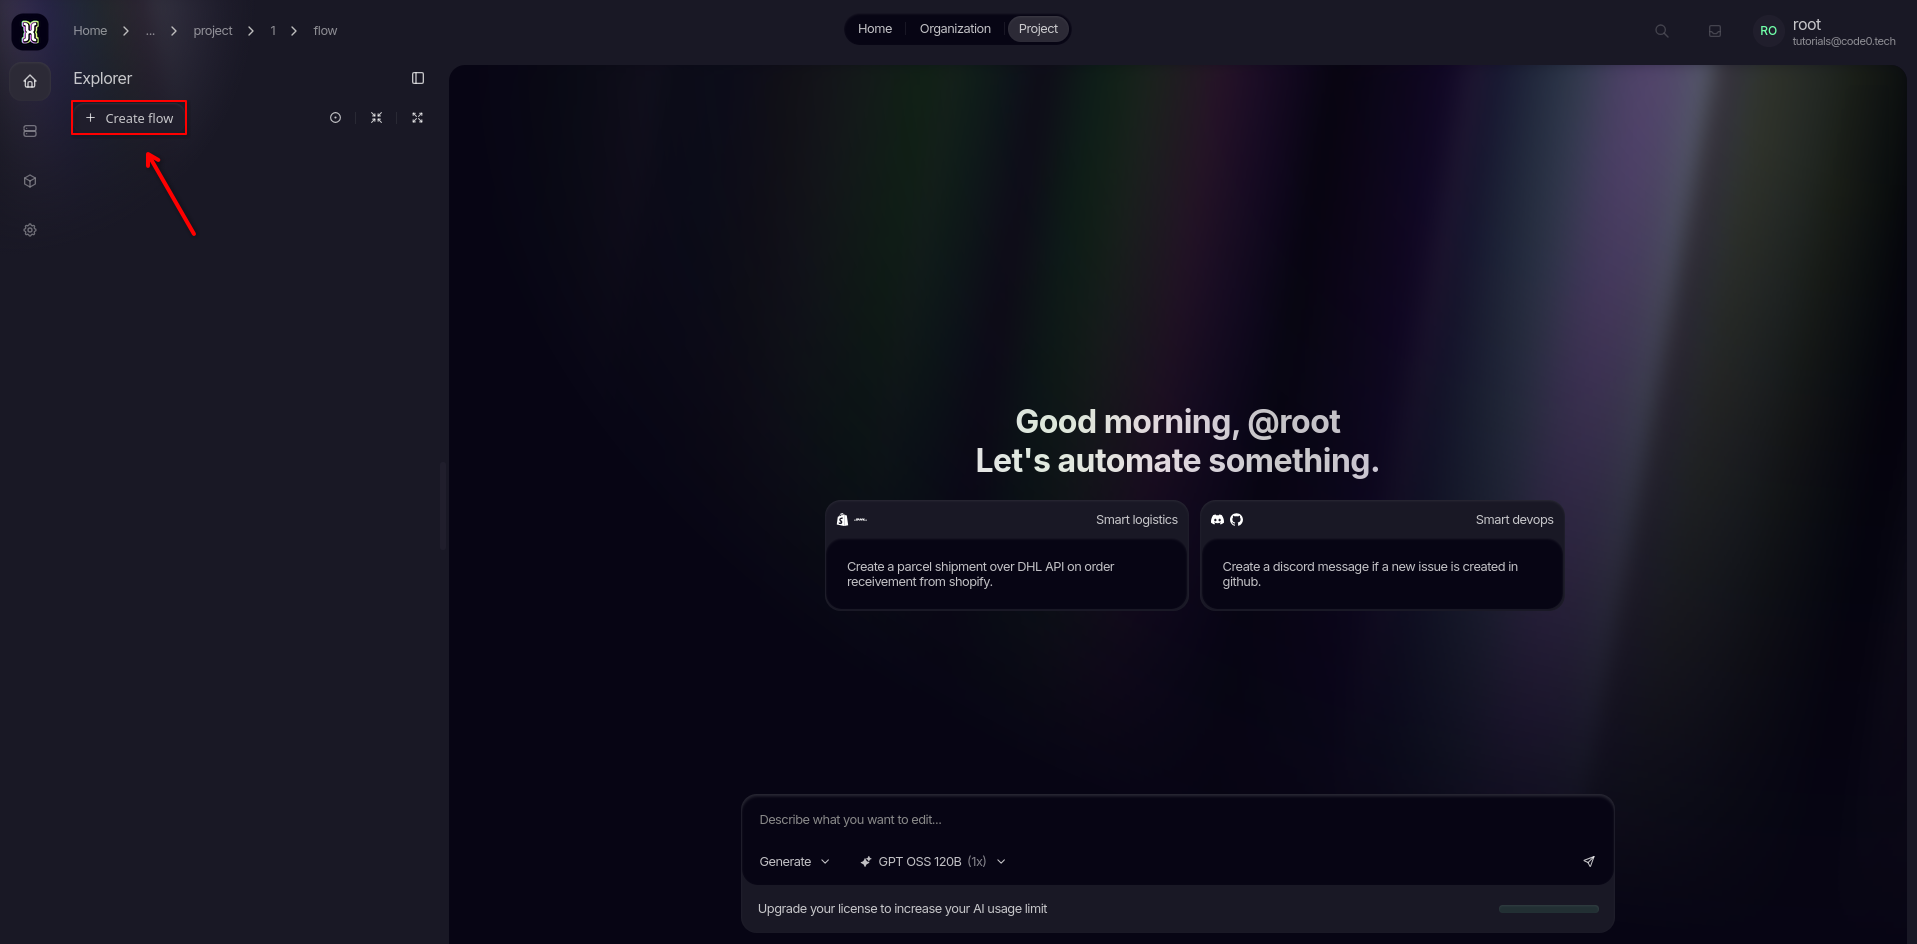
Let's begin by creating a fresh canvas. Click the create button to get started.
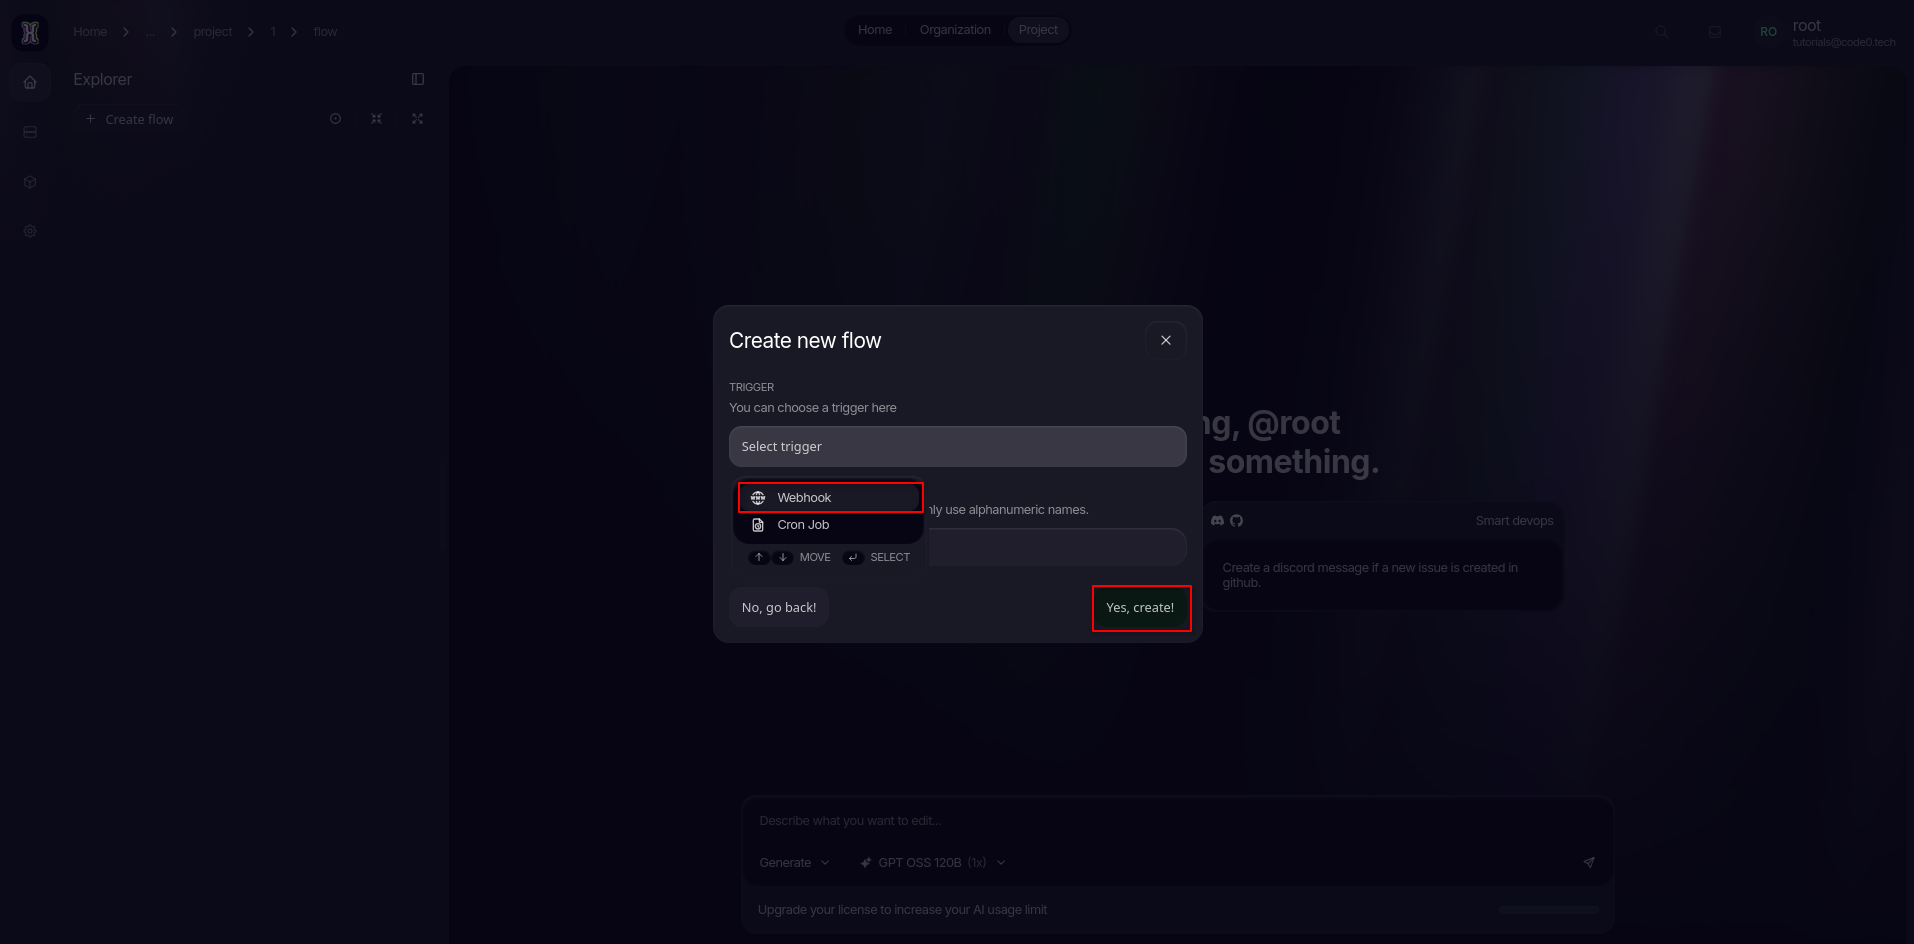
Set the trigger type to REST Endpoint, give your flow a memorable name, and hit create to open up your new workspace.
Access the node settings
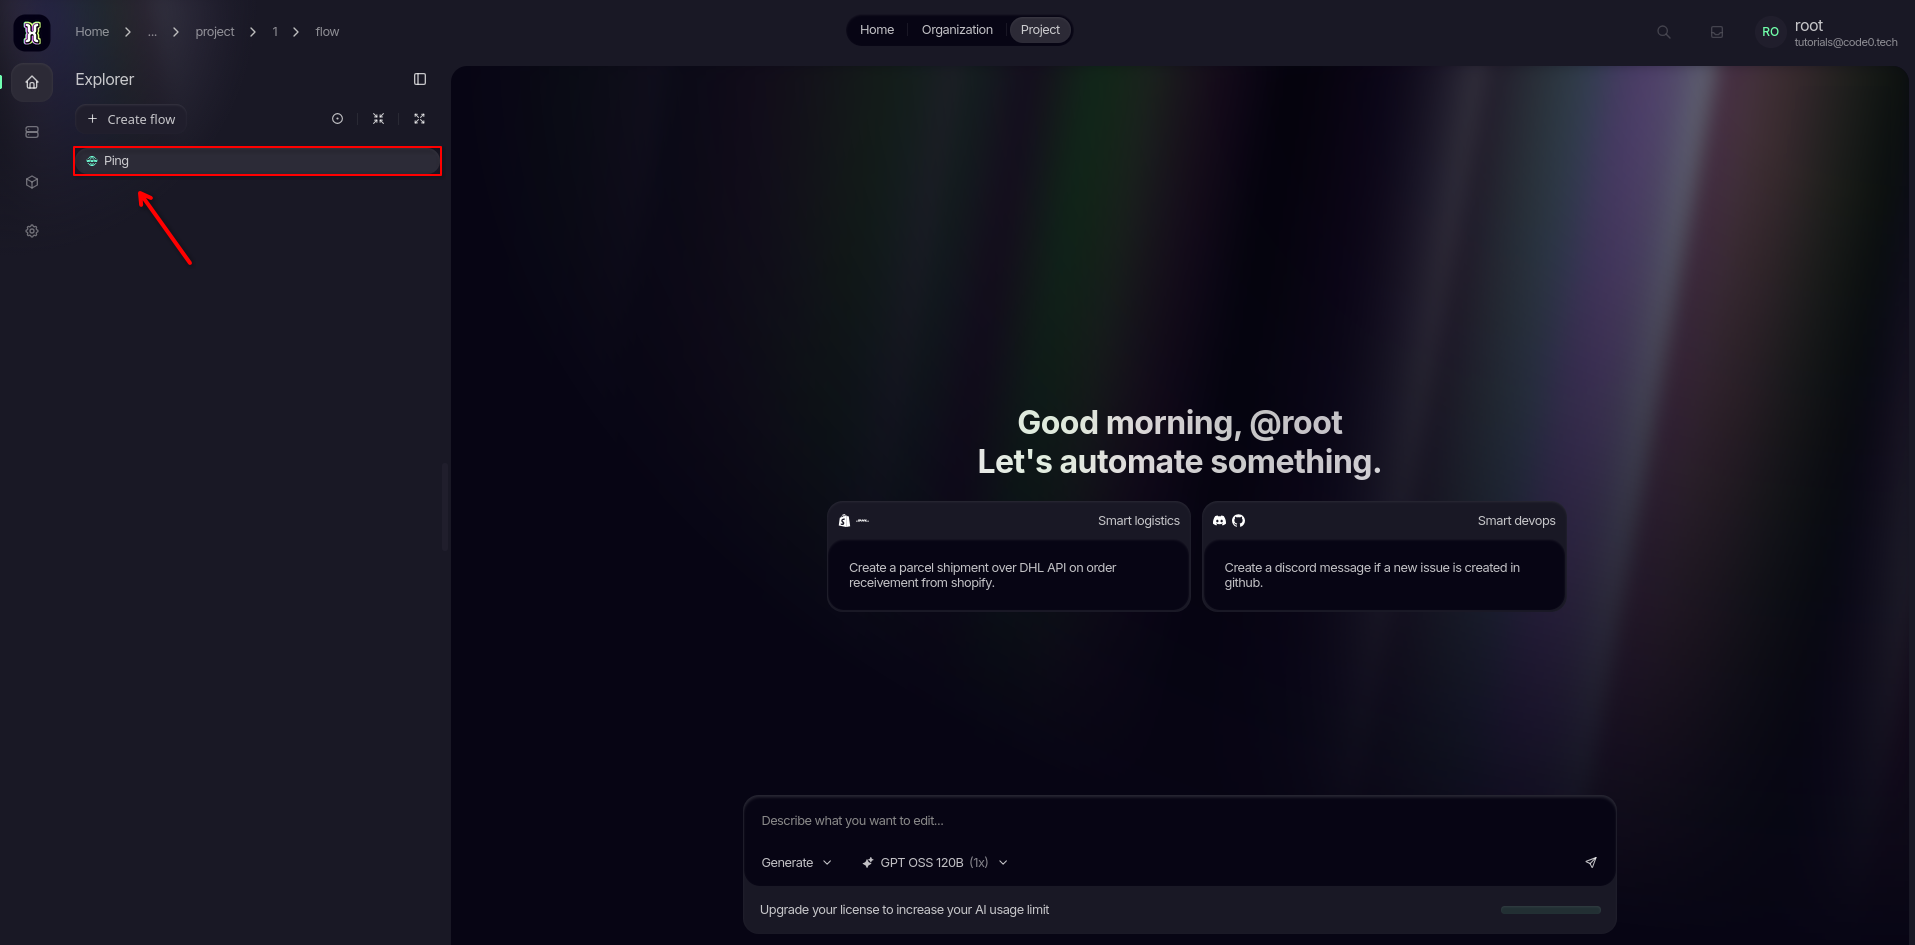
Locate and open your newly created flow from the explorer list.
Click on the Starting Node to highlight it. Then, take a look at the right-hand side of your screen and open up the Node Settings panel. This is where the magic configuration happens.
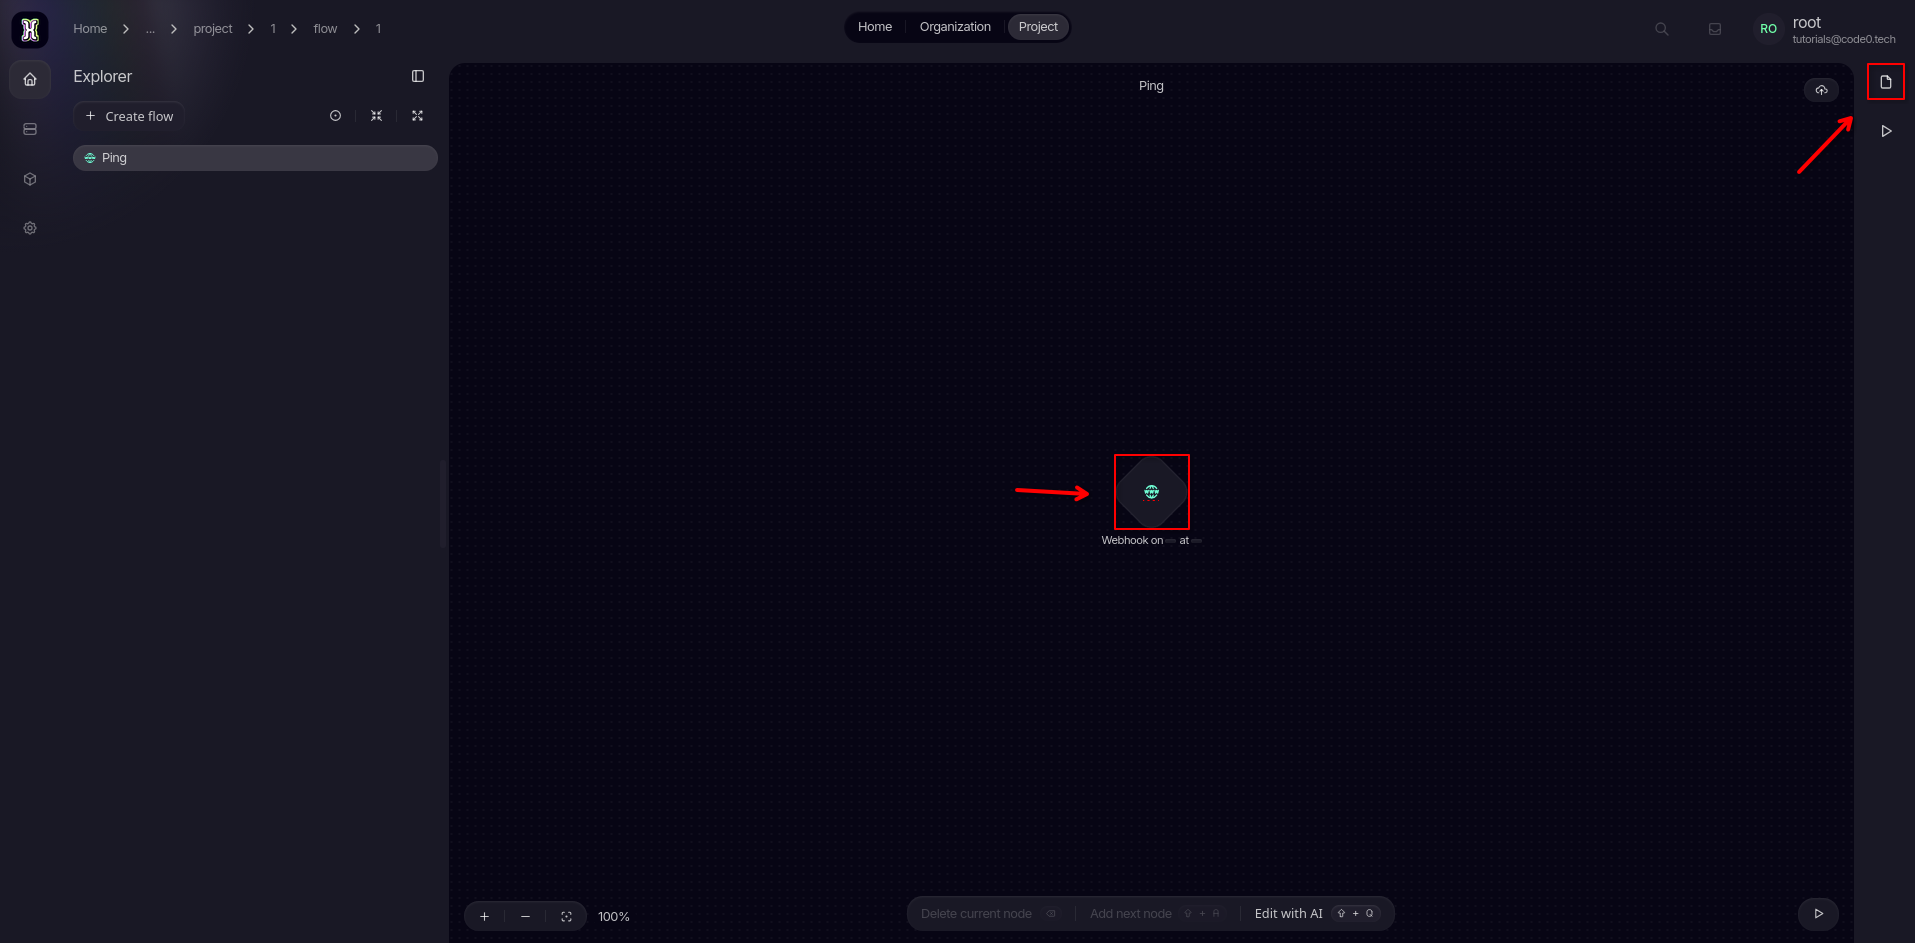
Form here we can start setting up our starting node.
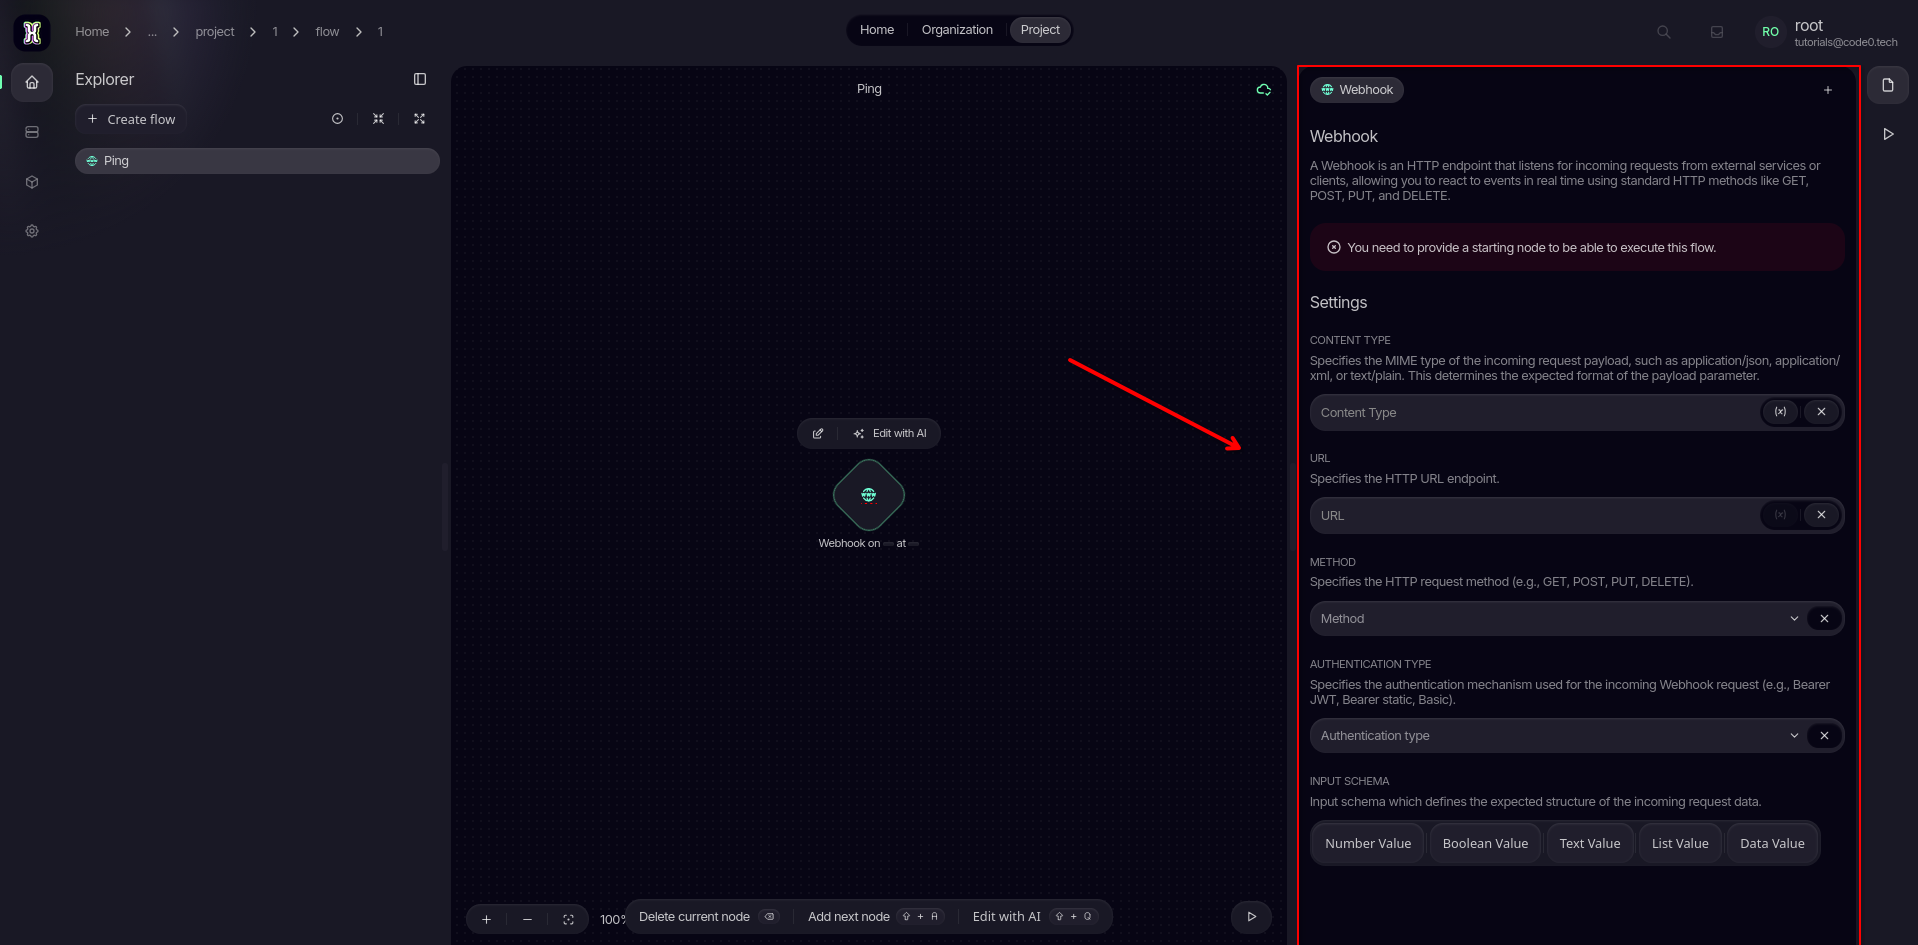
Configure your endpoint & logic
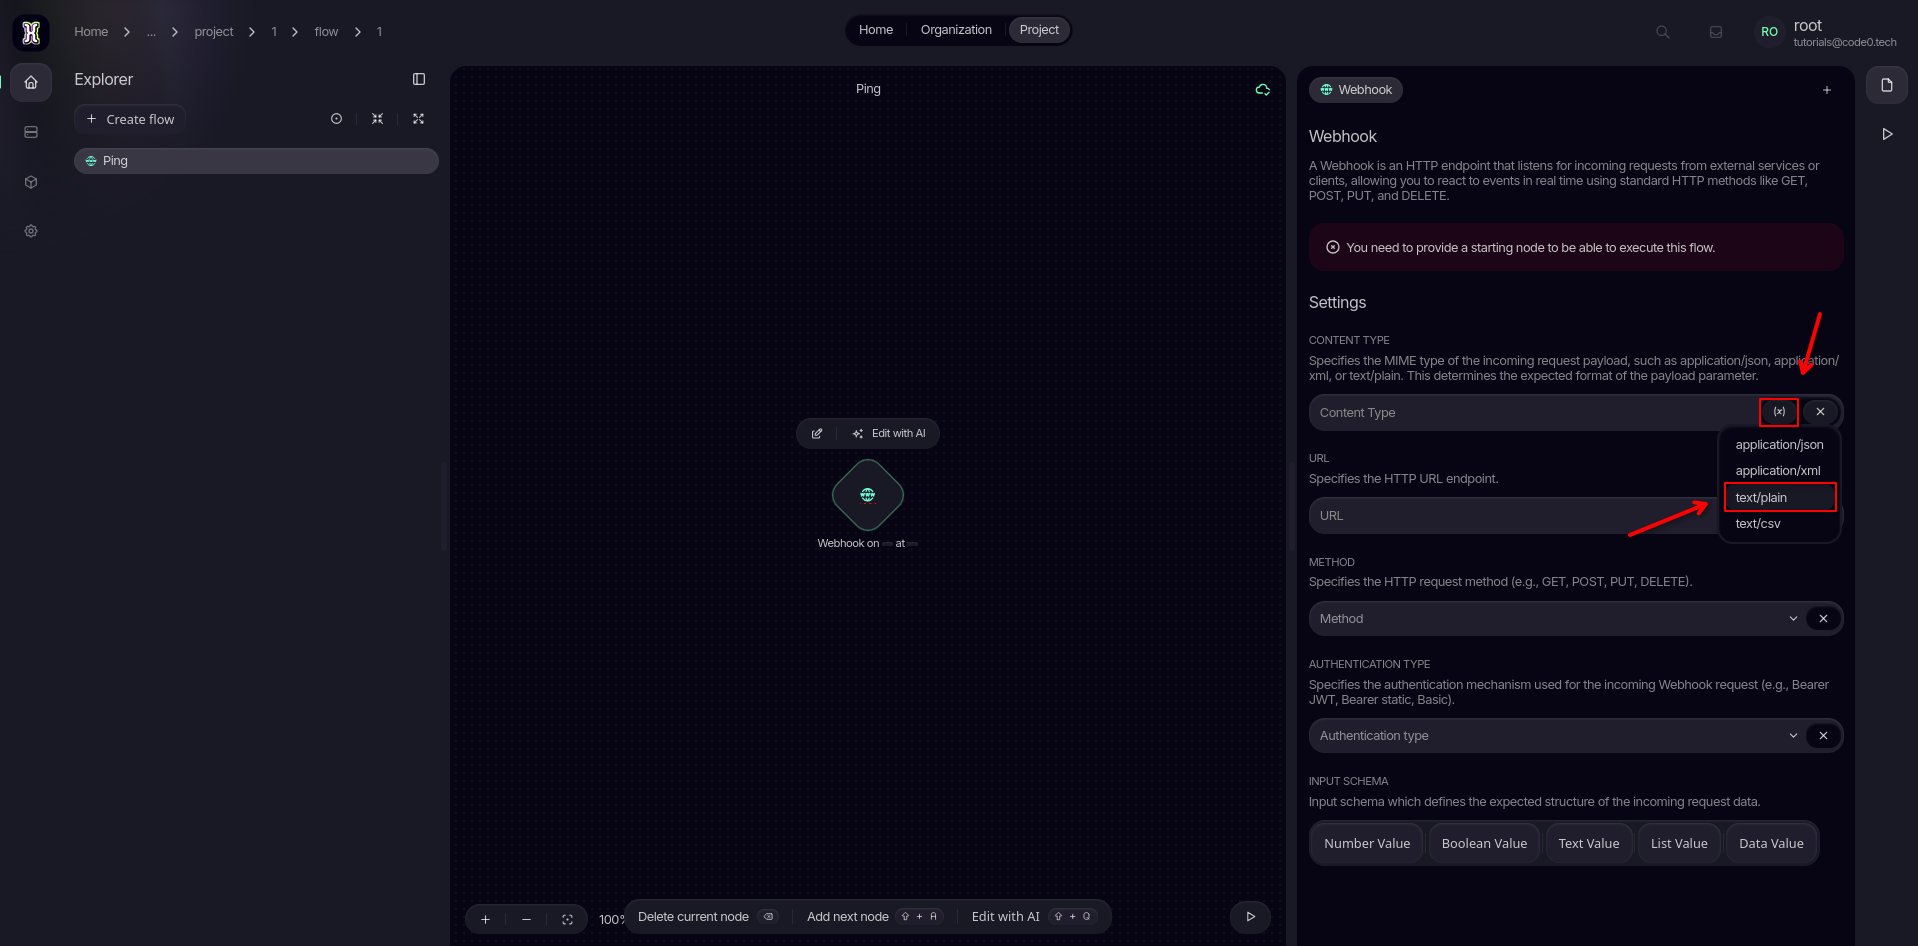
First, let's define the data type. Click on the variable (x) icon and select text/plain from the list.
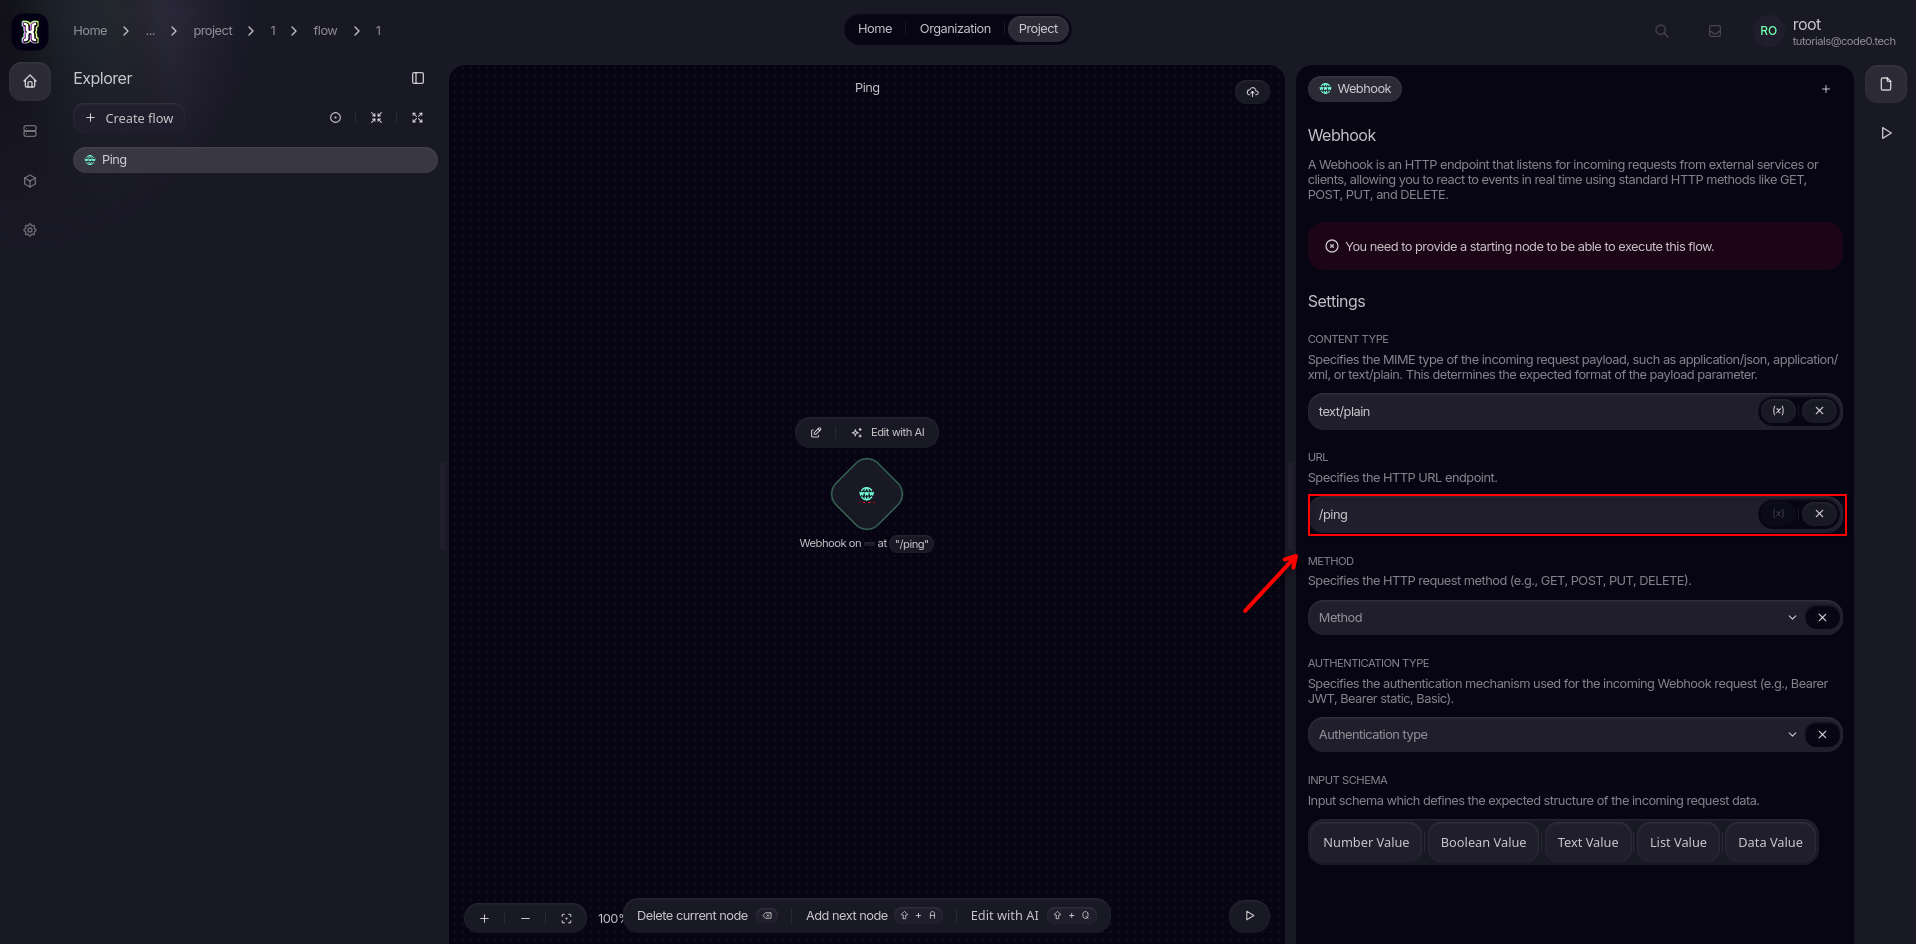
Next, let's give your flow an address. Type a clean path like /ping into the URL endpoint field.
💡 What is a URL endpoint? This acts as the unique web path for your flow. When combined with your specific project slug, it forms the full web address you will use to trigger this logic.
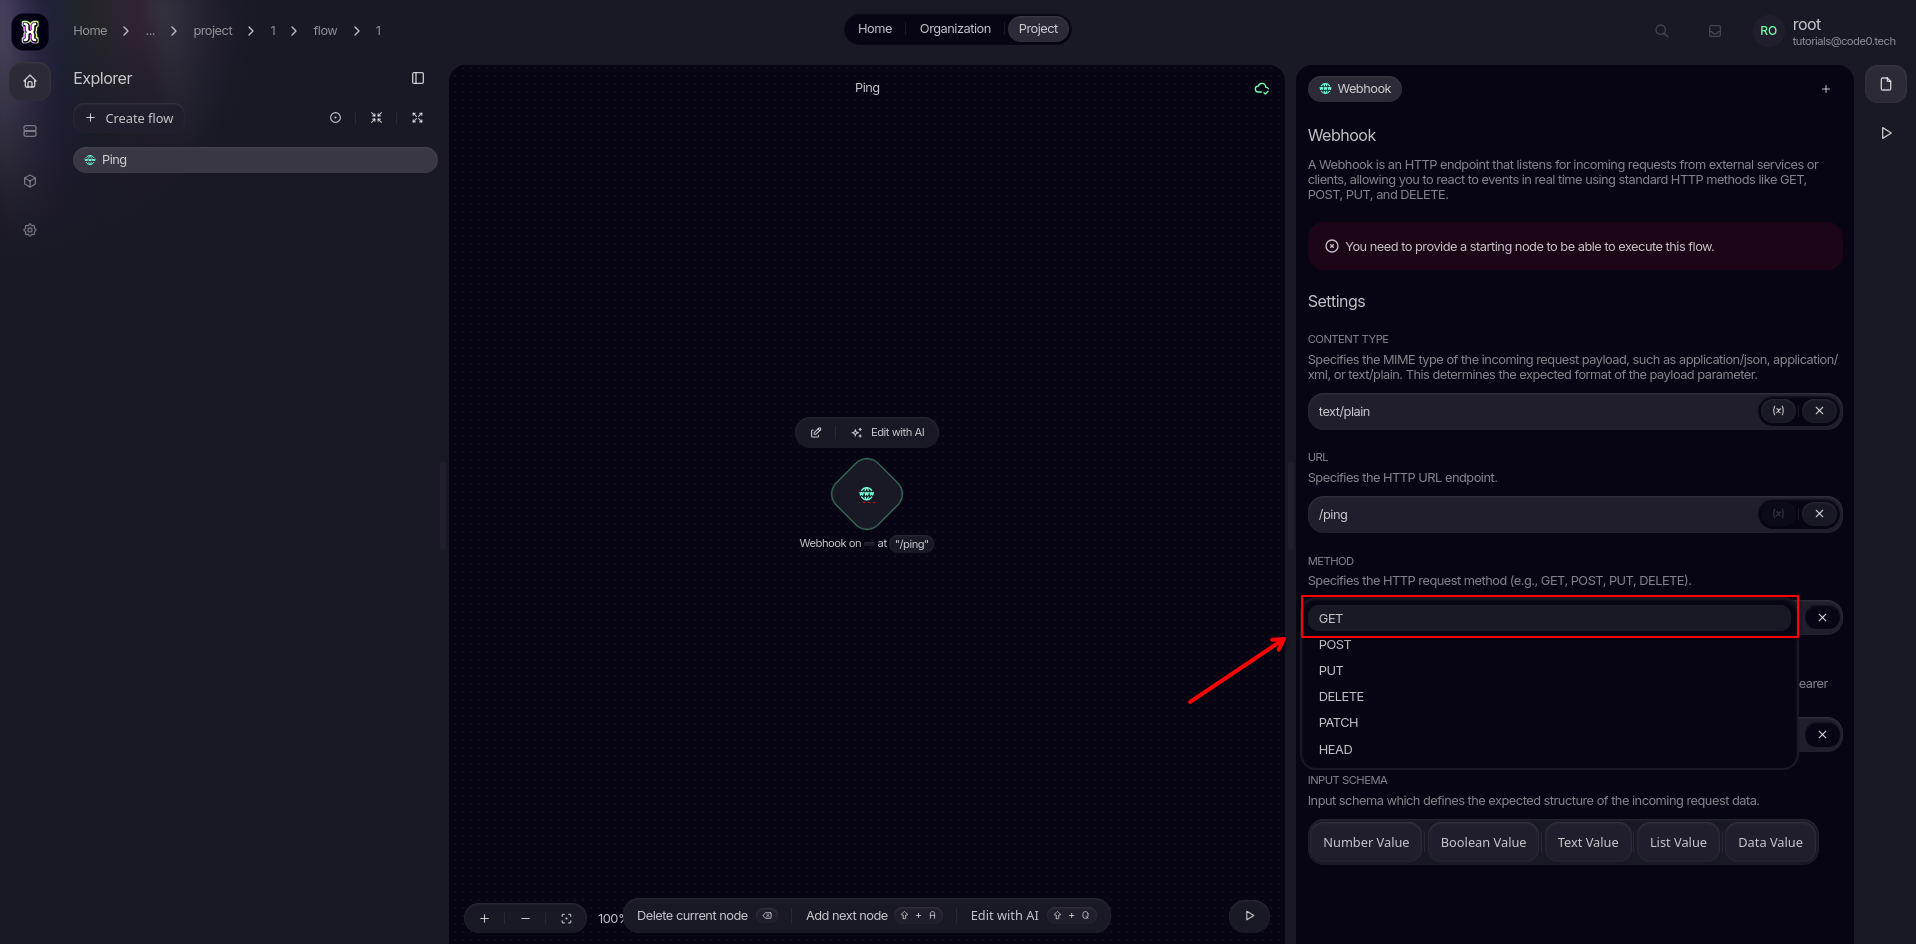
Choose the GET method from the dropdown menu. We are using GET for this project so you can easily test and preview the results right inside your favorite web browser.
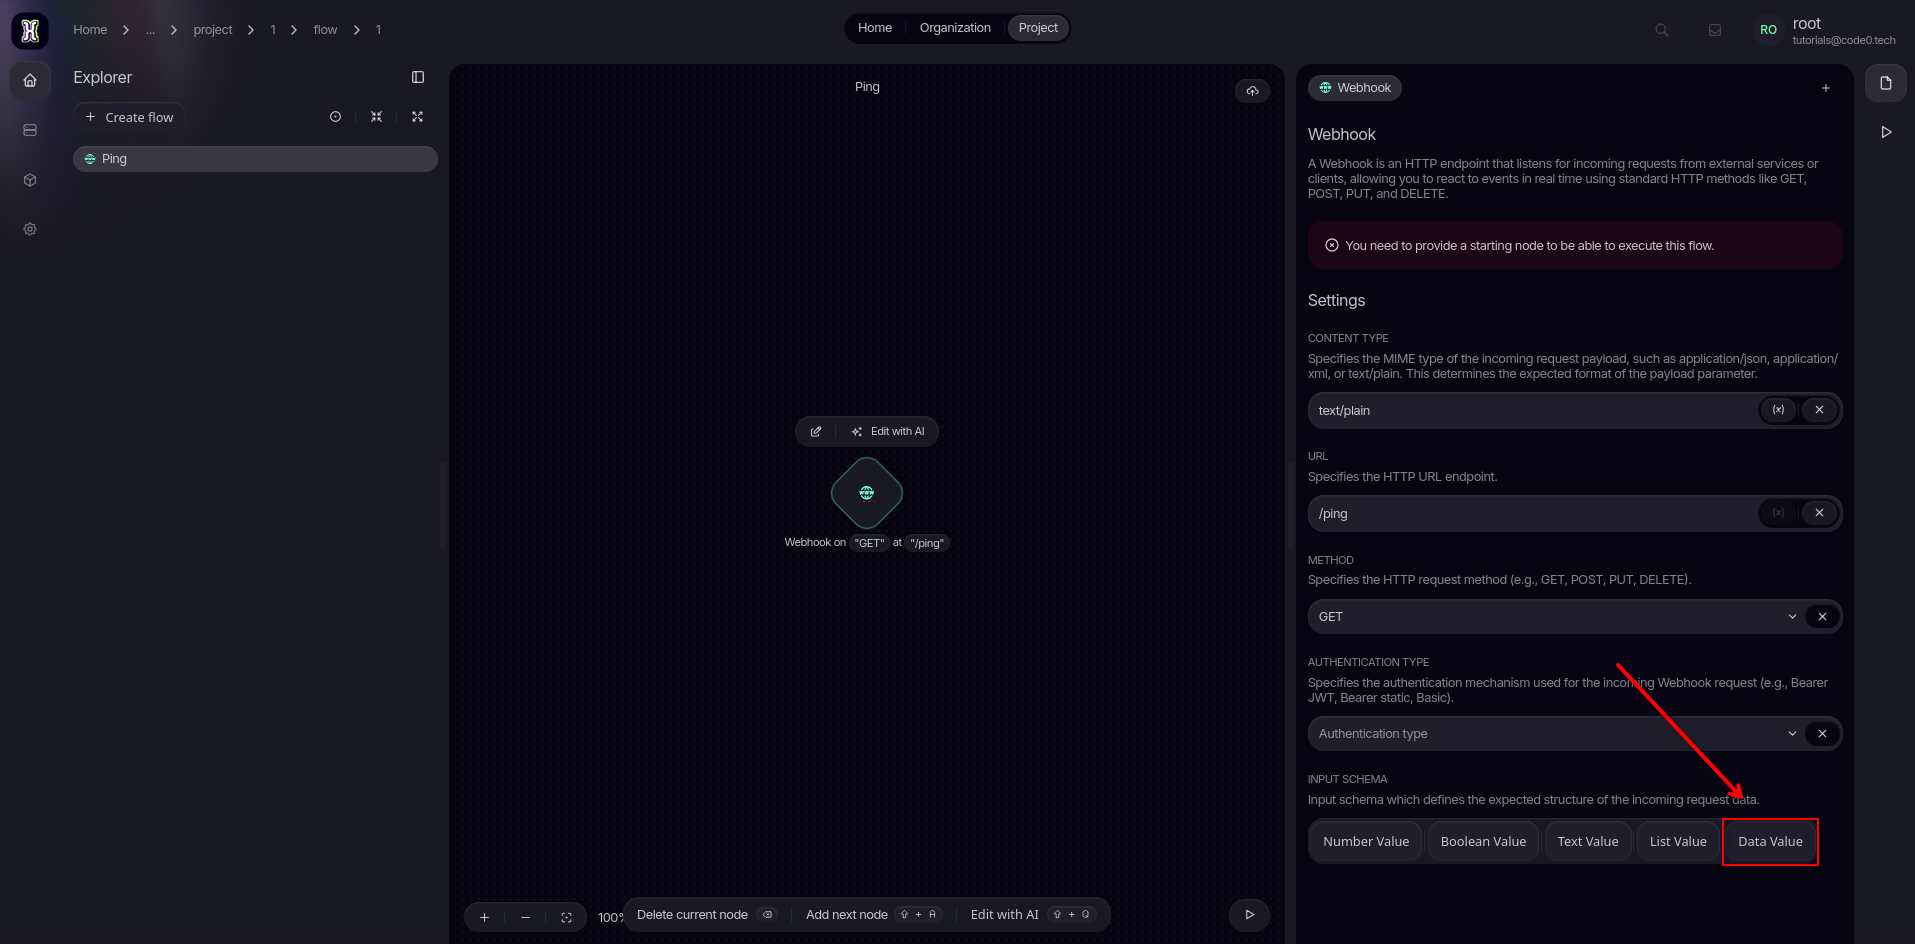
Set the incoming input schema to Data Value to keep the format simple and clean.
Add a responde node
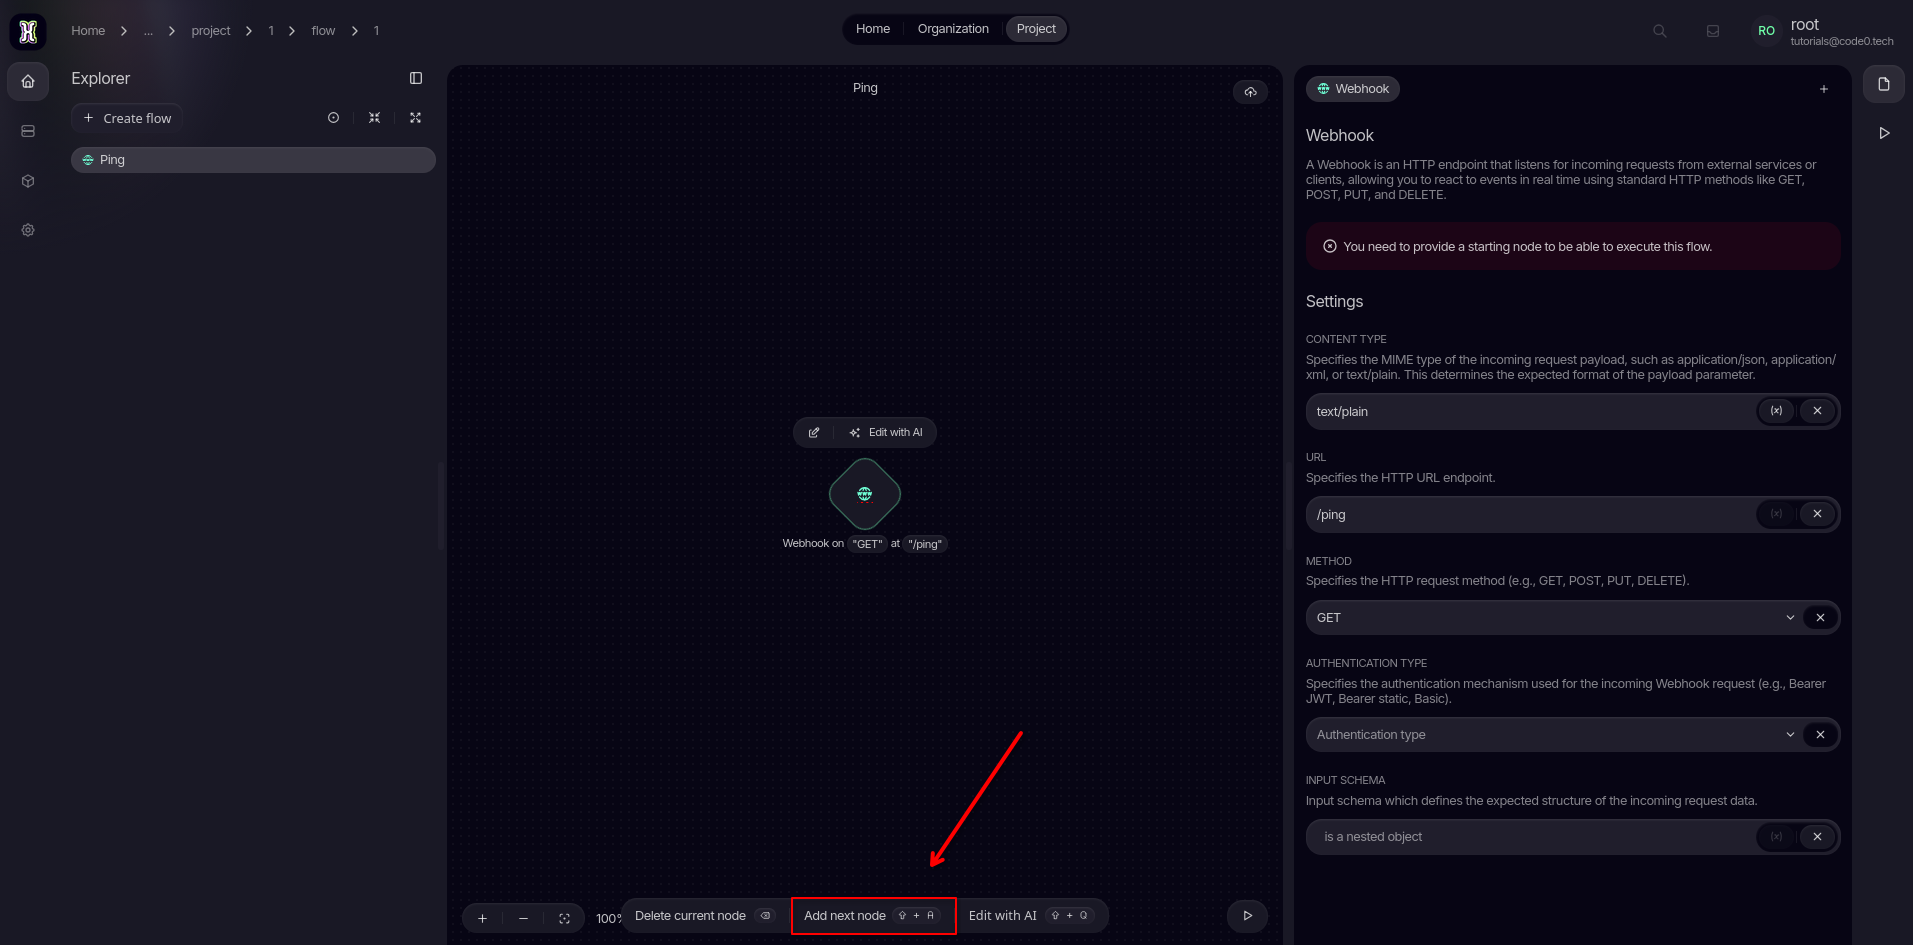
Now, let's add some action! Open up the Node Menu to browse available blocks.
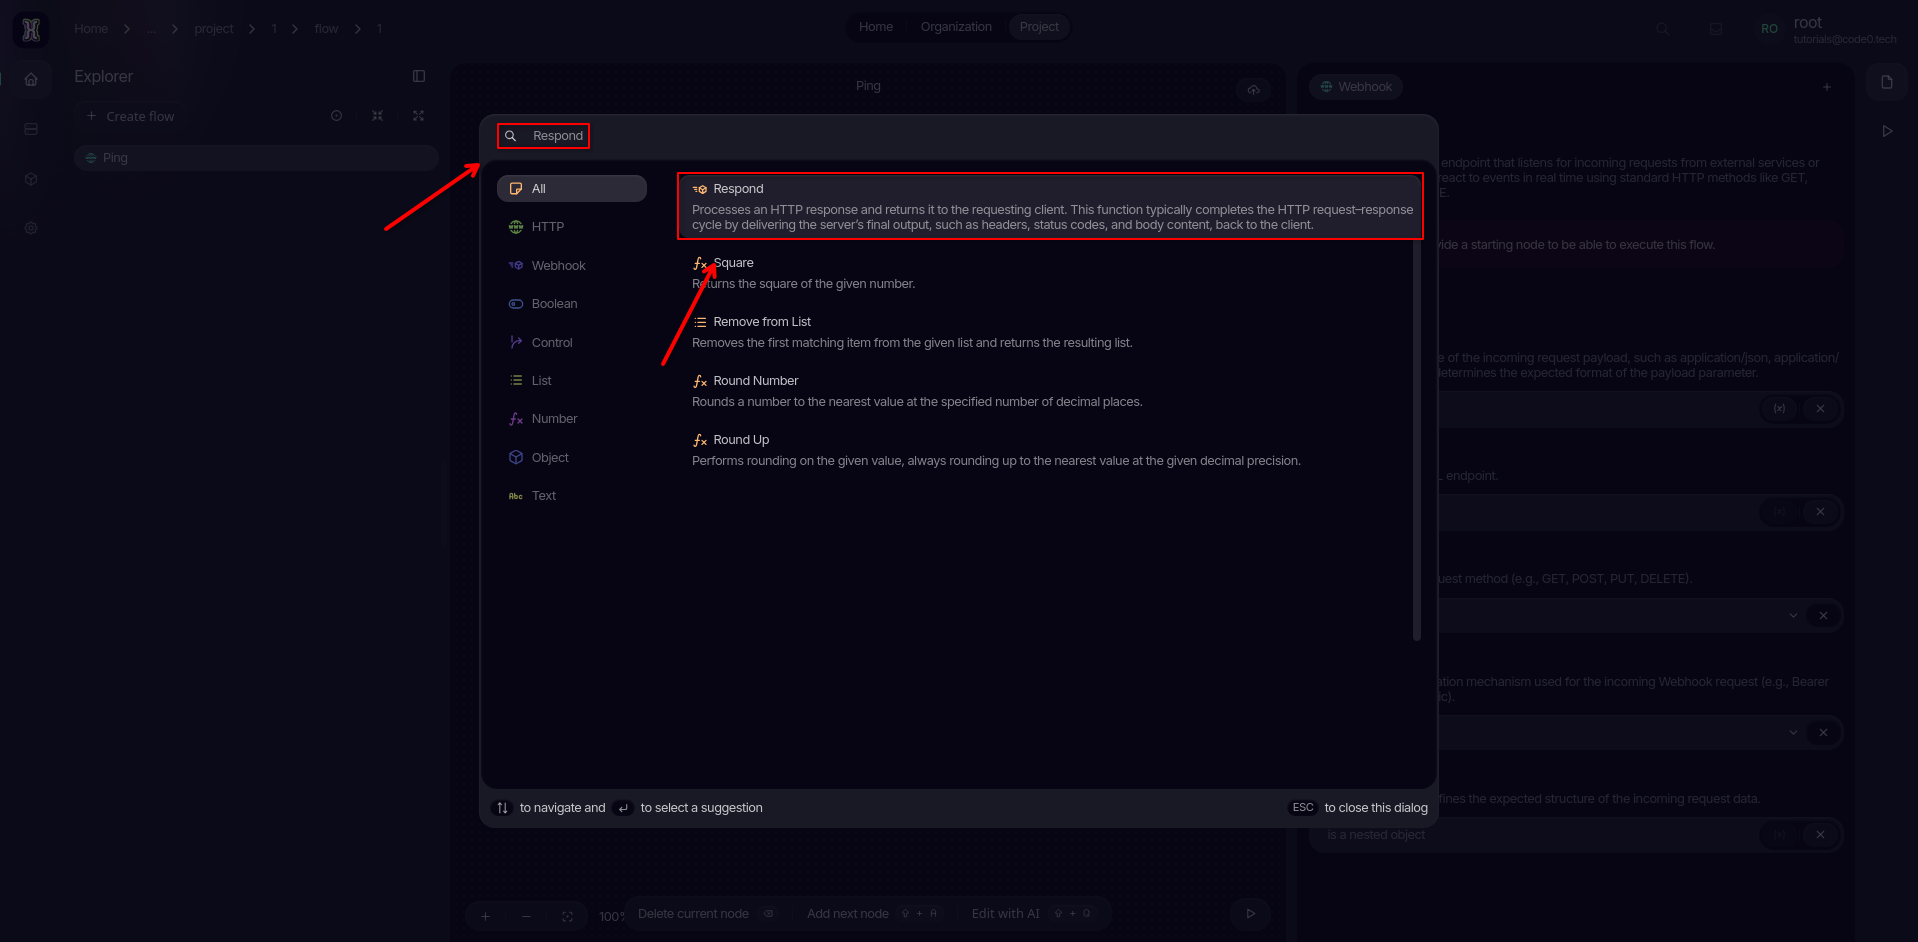
Type Respond into the search bar and select the corresponding node to add it to your workflow canvas.
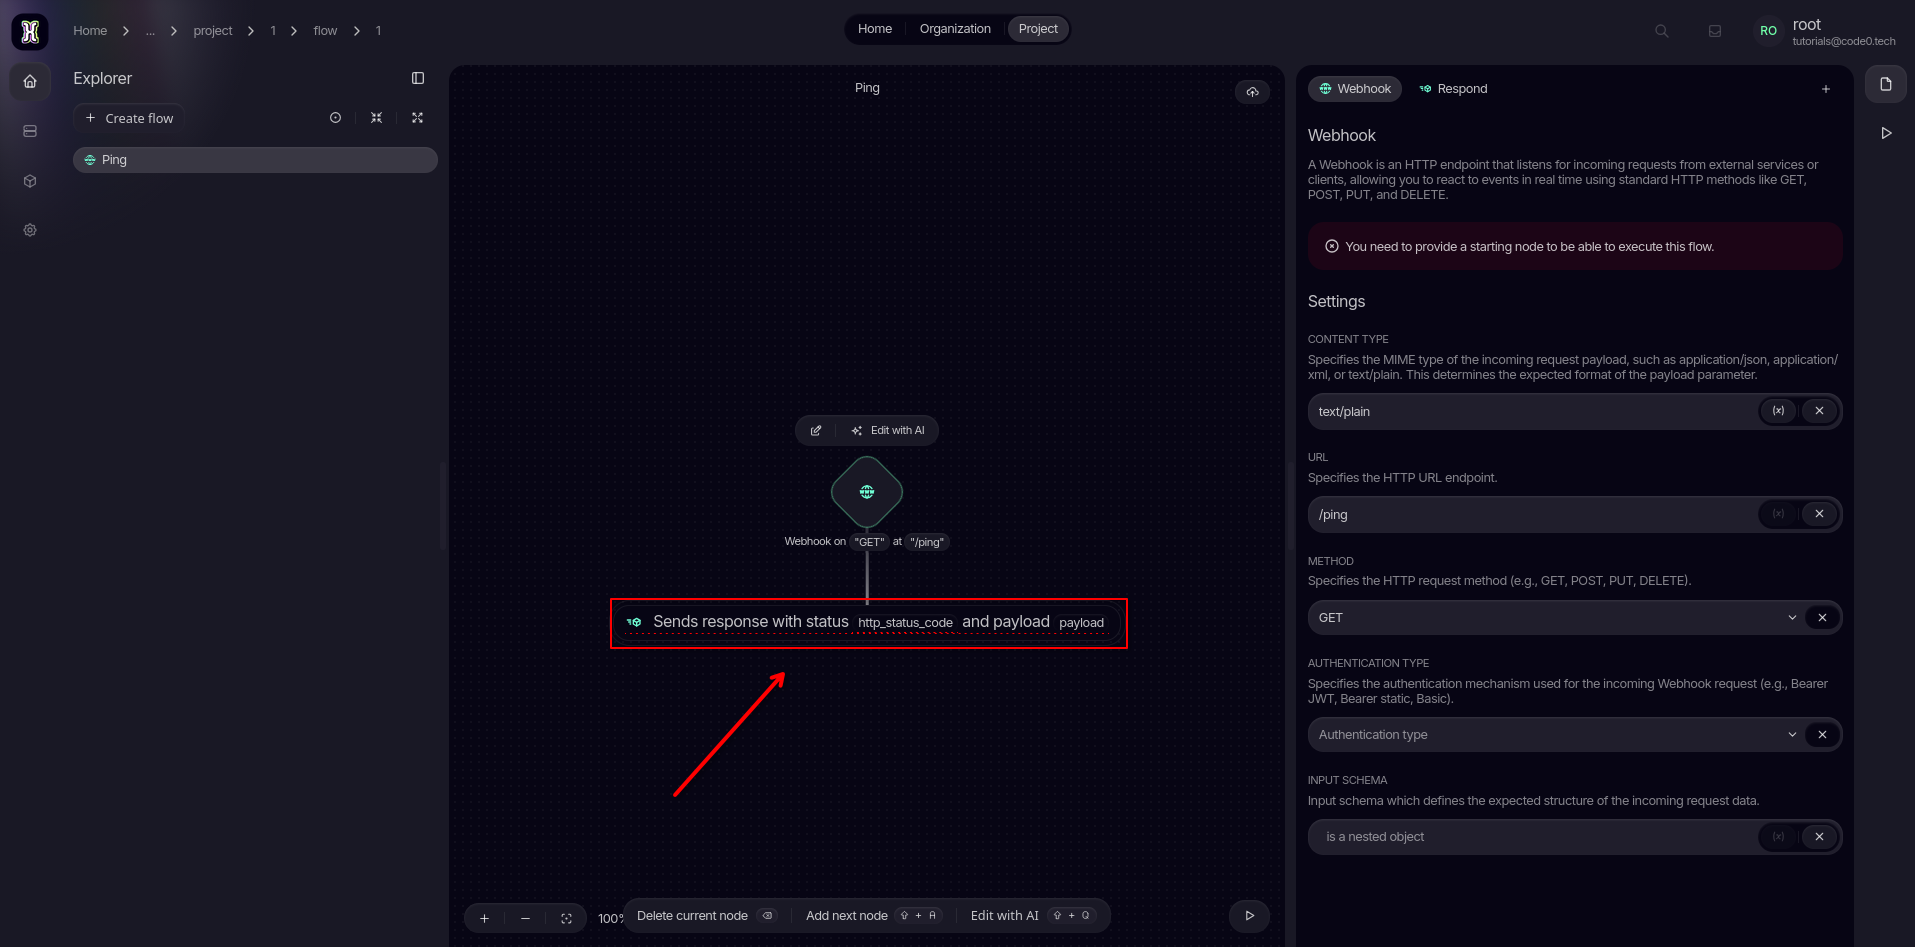
Click on the newly placed Respond node to configure.
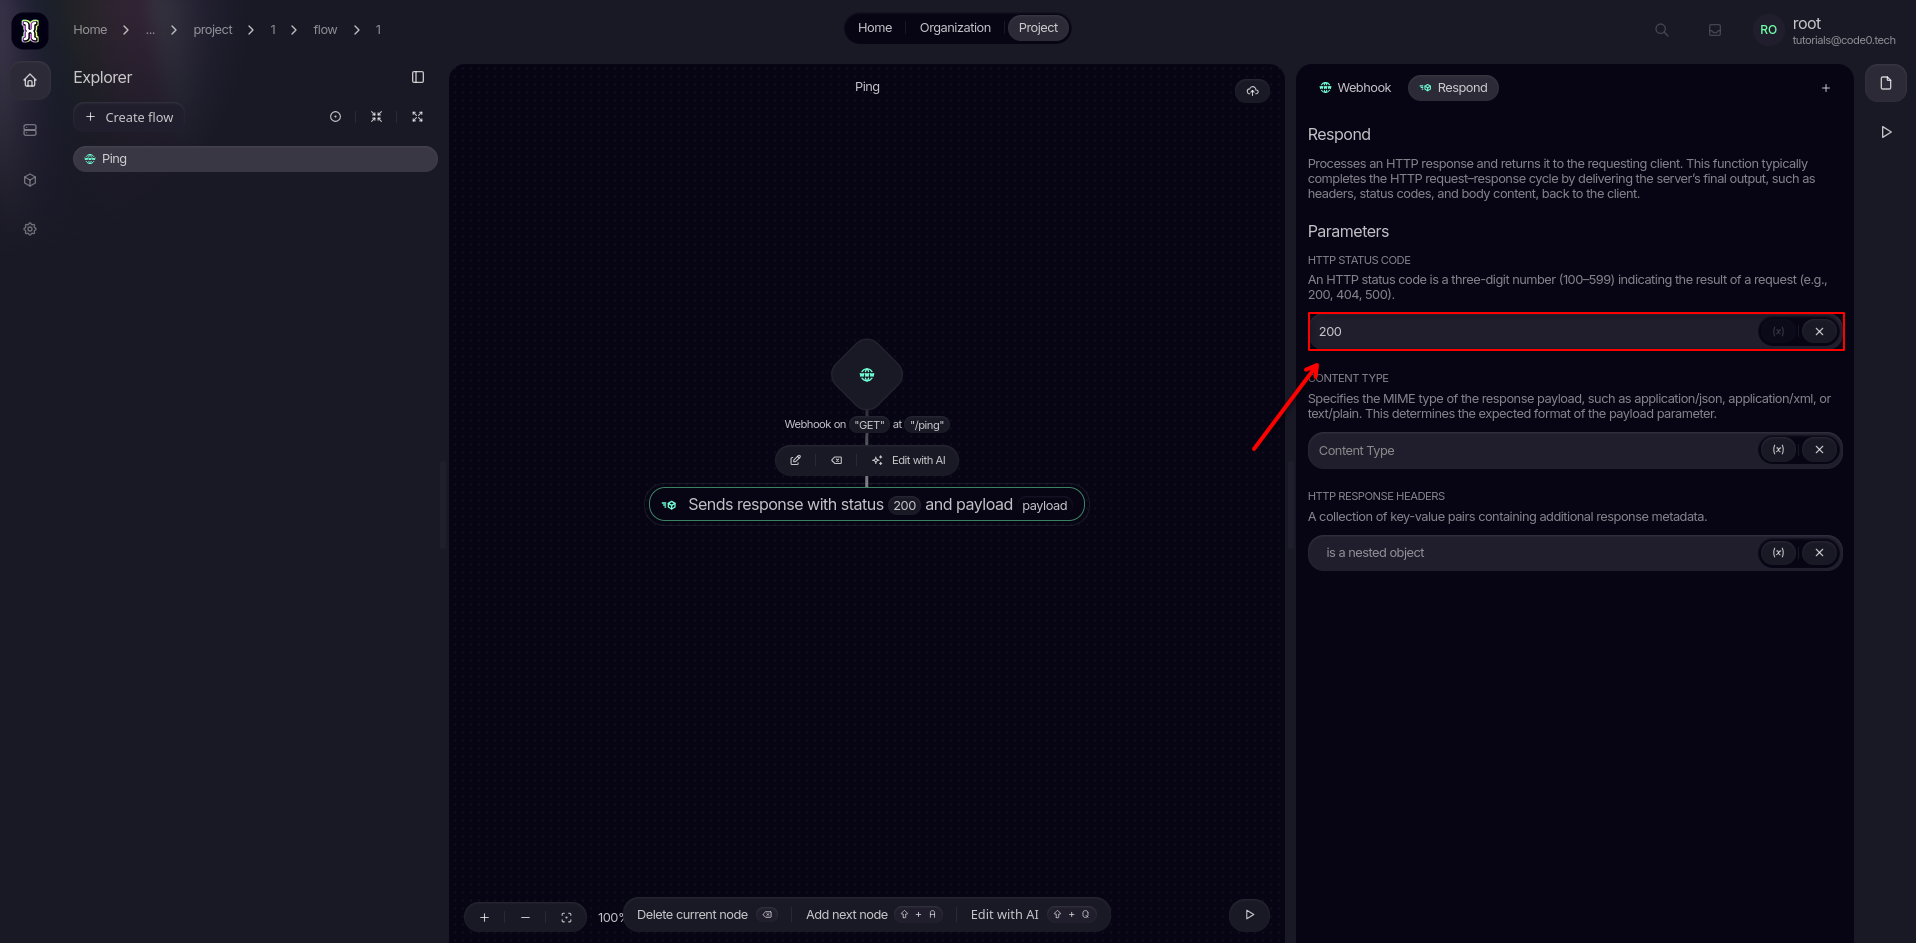
Let's tell the client everything went smoothly. Set the Status Code to 200 (the standard HTTP code for "OK").
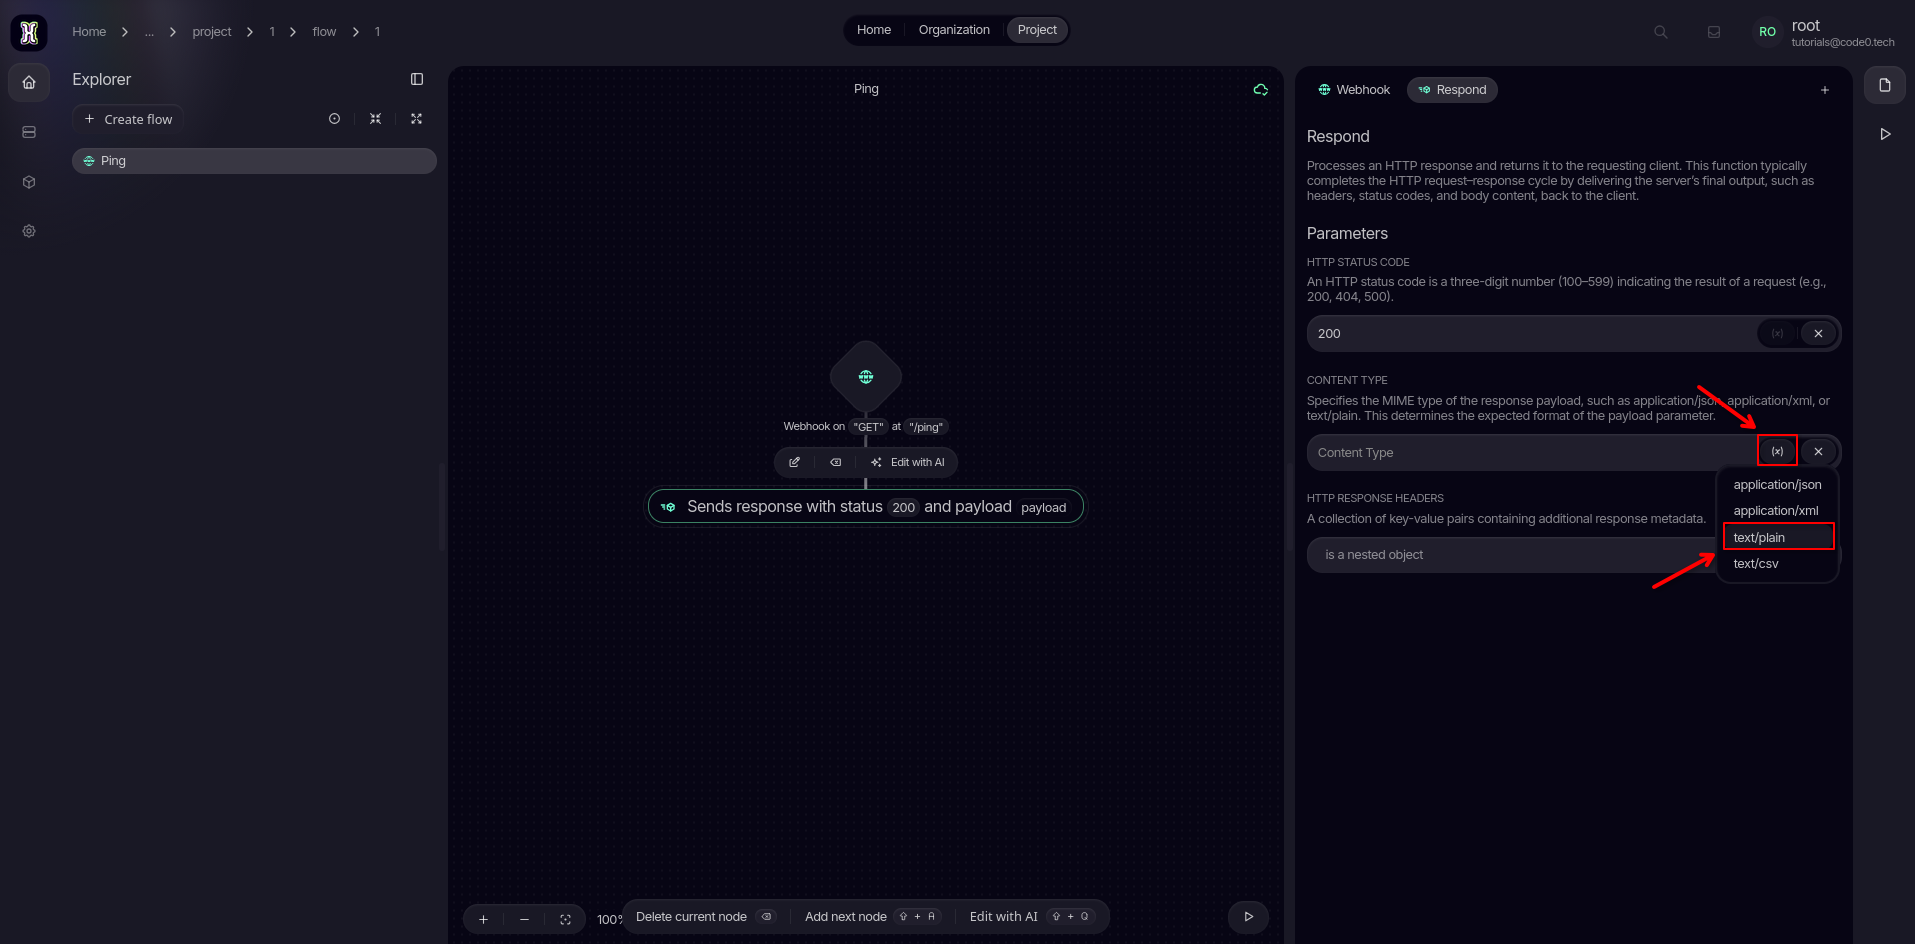
Just like before, use the (x) variable icon to set the response content type to text/plain.
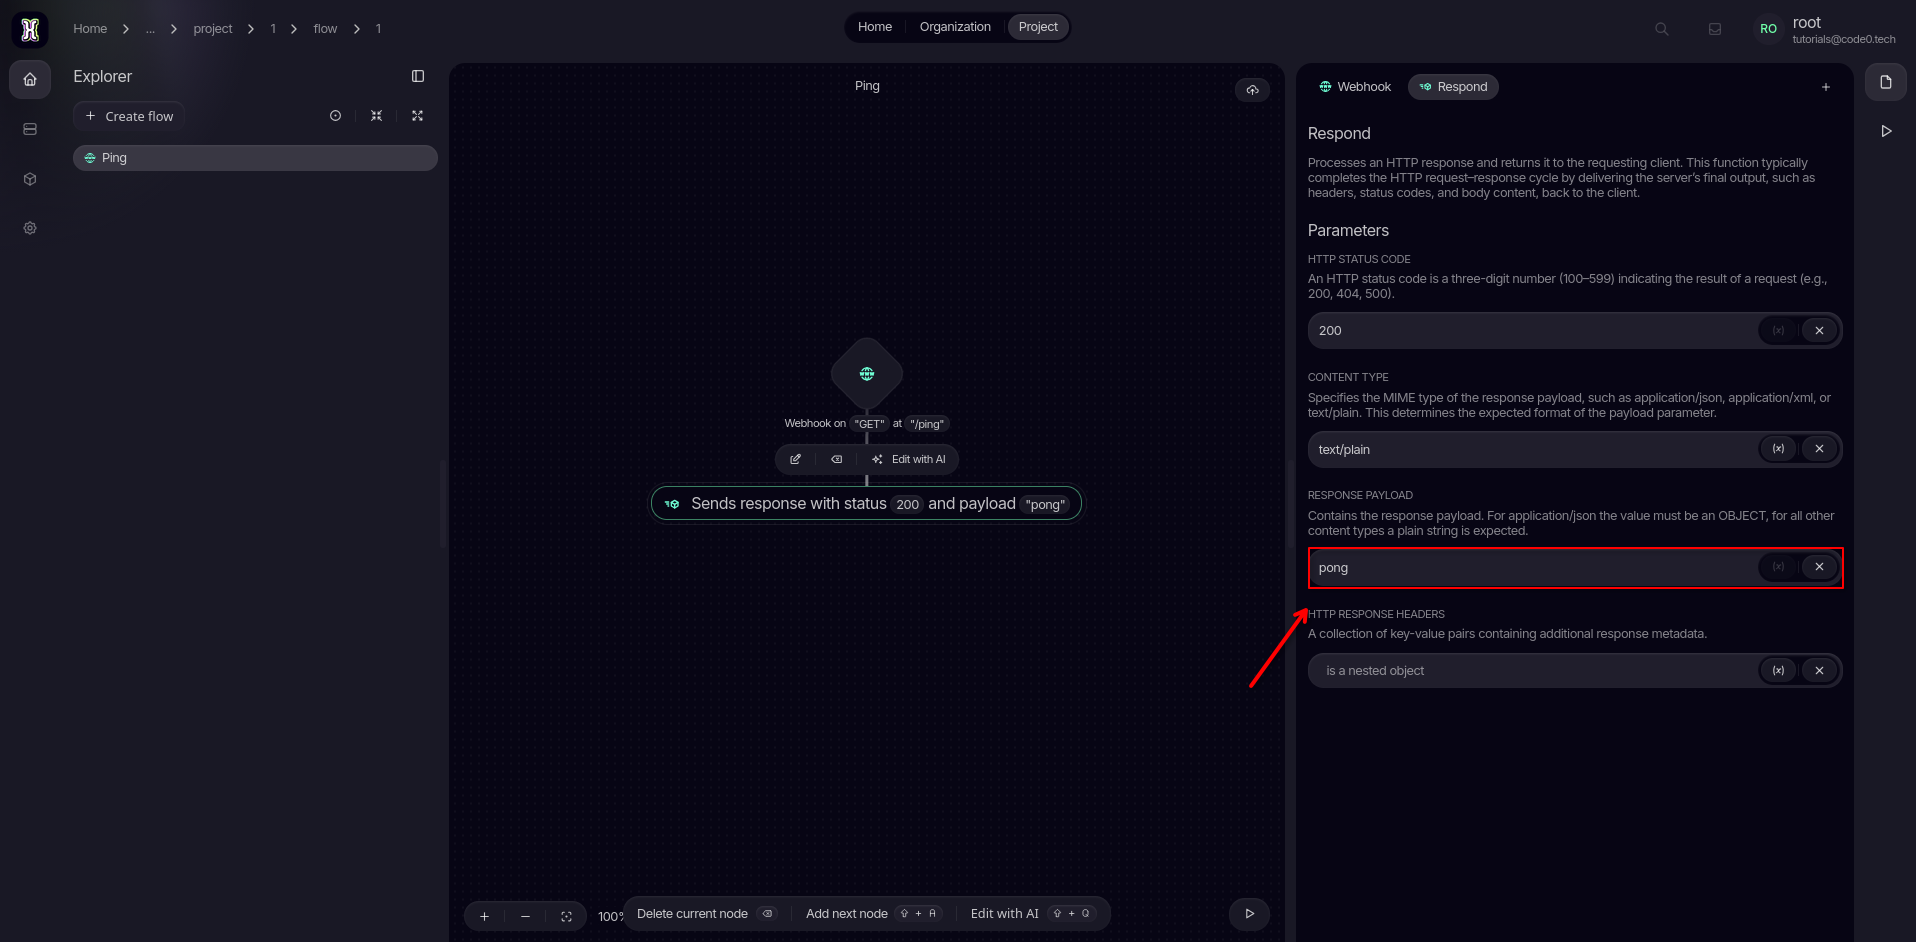
Type the word pong into the content field. This is the exact text payload that will be sent back to the user.
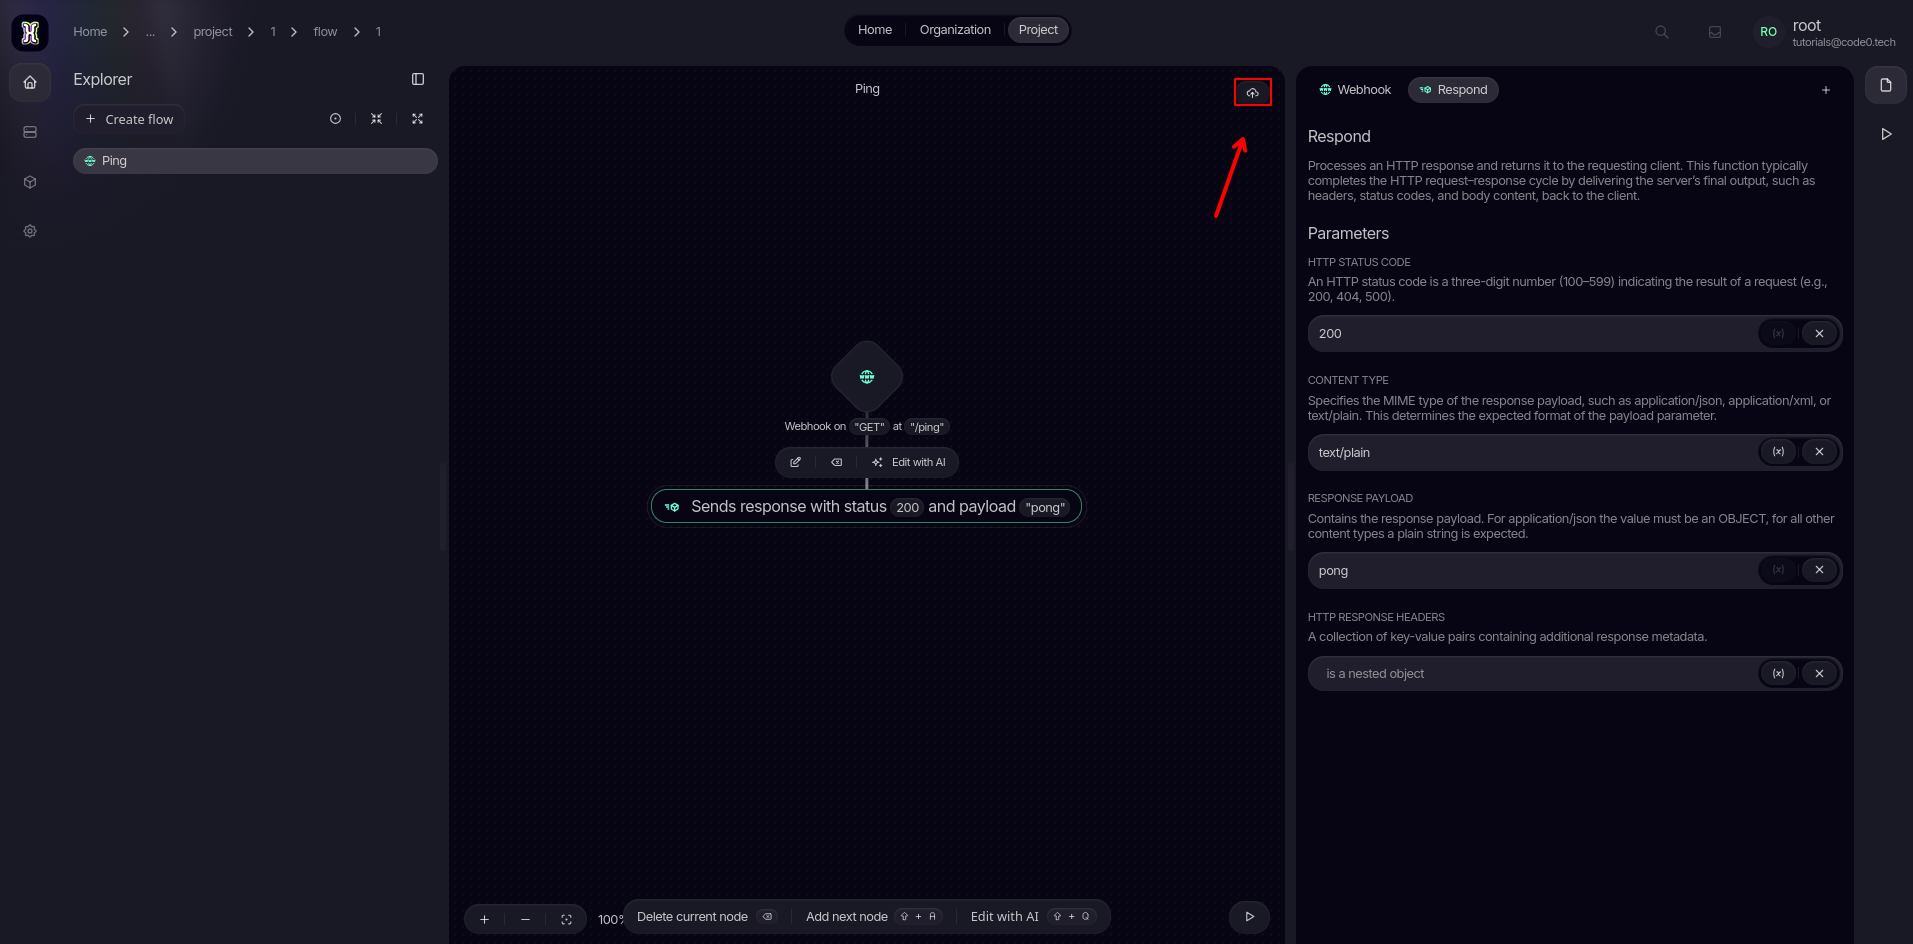
Don't lose your progress! Click the Save button in the toolbar.
Try out your flow
Time to test it out! Click on the Play button and copy the resulting HTTP URL to your clipboard.
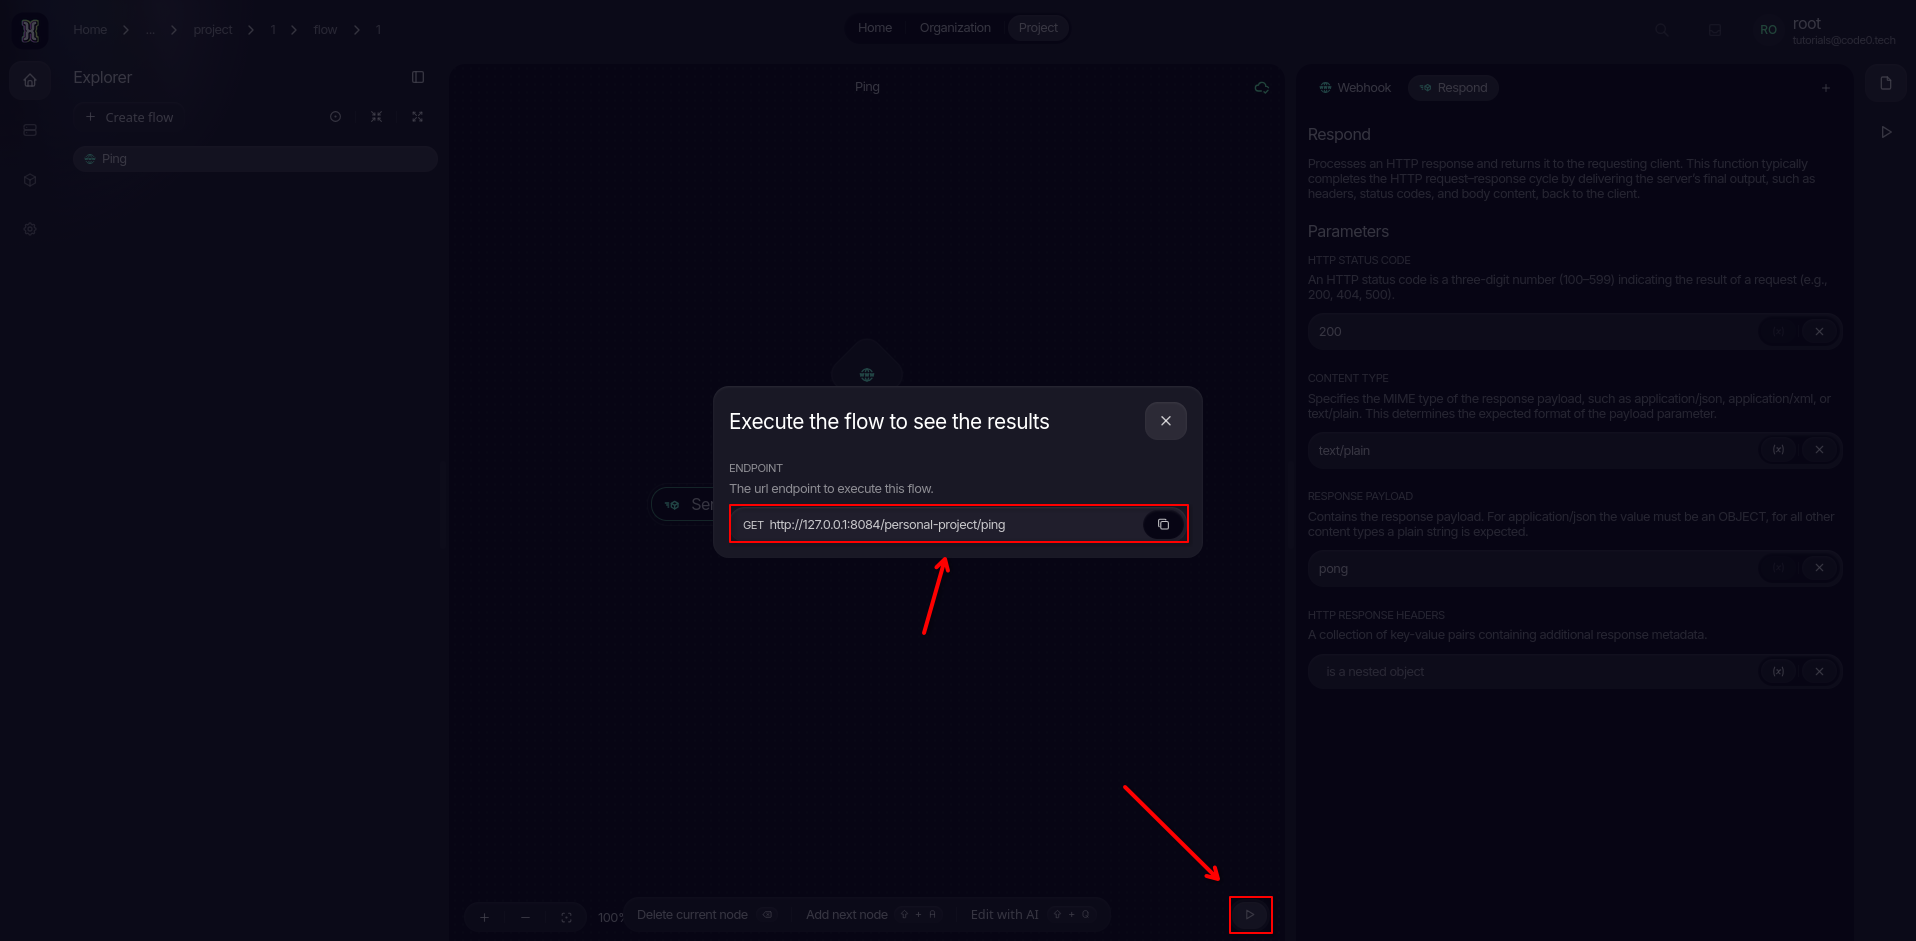
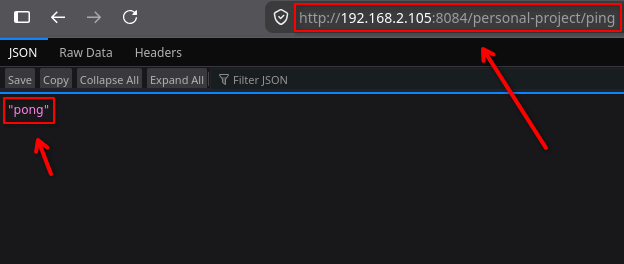
Finally, paste the copied link into a new browser tab.
If you are developing locally, feel free to adjust the IP address or host if needed.
Hit enter, and watch your flow instantly reply with pong!
What are my next steps?
Congratulations on deploying your very first endpoint! Now that you know how to receive a request and send a basic response, you can try passing dynamic data variables or adding conditional logic nodes to make your flow even smarter.